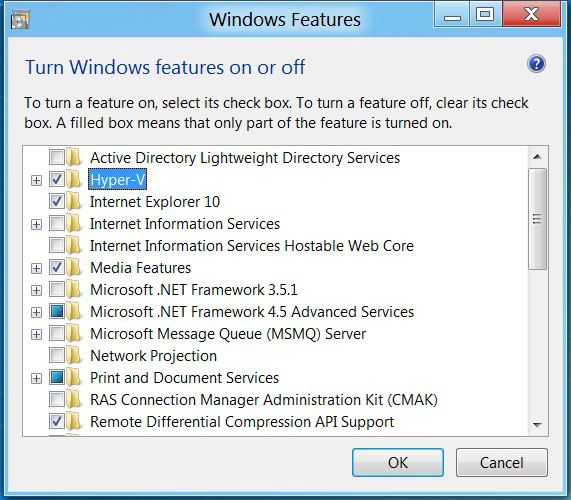
Microsoft brings Hyper-V on 64-bit version of Windows 8. Its first time ever when Windows client OS will have Hyper-V. Earlier it was available on Windows Server (Windows Server 2008 and Windows Server 2008 R2) only.
It allows creating both 32-bit and 64-bit operating systems in the VMs. This blog post is intended for IT Professionals and for Developers who need VMs to test or deploy their applications.
How To:
- Open Programs and Features by clicking the Start button > Control Panel > More settings and then clicking Programs and Features.
- In the left pane, click Turn Windows features on or off.
- Select Hyper-V and then click install. If you are prompted for an administrator password or confirmation, type the password or provide confirmation.
- Follow the instructions on the screen to install Hyper-V.
- When you’re done, restart Windows. There are two procedures you can use to start Hyper-V Manager on Windows 8: (1) Click Hyper-V Manager pinned shortcut on Start Screen and (2) Open Administrative Tools and click Hyper-V Manager shortcut.

Applies To:
- Windows 8 Developer Preview (64-bit only)

Leave a Reply to Md Minhaj Cancel reply