If you are newbie and want to setup essential and initial system protection to protect accidental damage of your data, this article for you. It elaborates step by step methods to Turn On/Off System Protection, Create restore points aka checkpoints manually and restore Windows to safe state.
How To: Turn On/Off System Protection
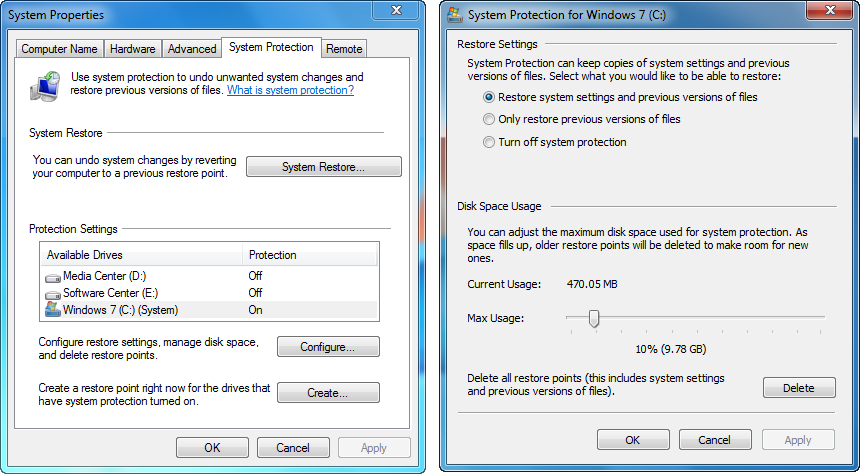
1. Open Control Panel > System Security > System or type “system” in StartSearch and click on “System” under Control Panel. A window with basic System information appears, now click on System Protection from left pane.

2. Select appropriate drive and click on Configure… button, a System Protection settings window appears for selected drive. Under Restore Settings, you can choose Turn off system protection and click on Apply to commit changes. It will delete previous restore points and versions of files and folders.
3. Under Disk Space Usage, you configure the space is used for system protection for particular drive and delete previous restore points and versions of files and folders by clicking on Delete button.
Apart from above setting, you can choose to enable/disable among Previous Versions only.
Create restore points(check points) manually
1. Open the same location as above i.e. Control Panel > System Security > System and click on System Protection from left pane.
2. Now select desired drive & click on Create… button and give a name to the restore points. It might take 1-2 minutes to accomplish. That’s it!
Restore to previous checkpoints (safe state)
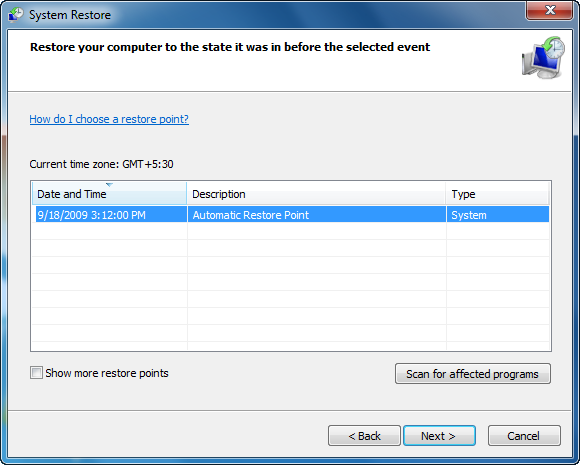
1. Type “system restore” in StartSearch and click on “System Restore” under Programs. A window appears, click on Next to choose previous restore points.

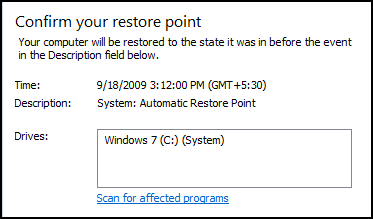
2. Once a restore point is selected, click on Next. Now confirm the operation and click on Finish button. It restore your files and folders and settings.

If you are not confirmed about, which program will affected? Click on link Scan for affected programs, it will show the list of affected programs.
Applies To:
- Windows 7 Ultimate
- Windows 7 Enterprise
- Windows 7 Professional
- Windows 7 Home Premium
- Windows 7 Home Basic
- Windows 7 Starter
Leave a Reply